Ready to give your nails a romantic makeover this Valentine's Day? Forget boring heart designs—we're elevating the classic French manicure with a touch of Valentine's Day flair! This guide provides easy-to-follow steps for creating gorgeous, romantic nails at home, regardless of your skill level. We'll explore various designs, from classic red and white with heart accents to glittery and glamorous options. Let's get started!
Get Your Supplies Ready: It's Mani Time!
Before we begin our nail art adventure, gather your essentials. It's like preparing for a fun craft project—only much prettier! You'll need:
- Base coat: Protects your nails and helps your polish last longer.
- Top coat: Seals the design, adding shine and durability.
- White nail polish: For the classic French tip. Feel free to experiment with other colors!
- Valentine's Day color(s): Reds, pinks, soft pastels—whatever suits your romantic style!
- Fine nail art brush: Or striping tape for crisp lines.
- Optional extras: Tiny heart-shaped studs, rhinestones, or glitter for extra sparkle.
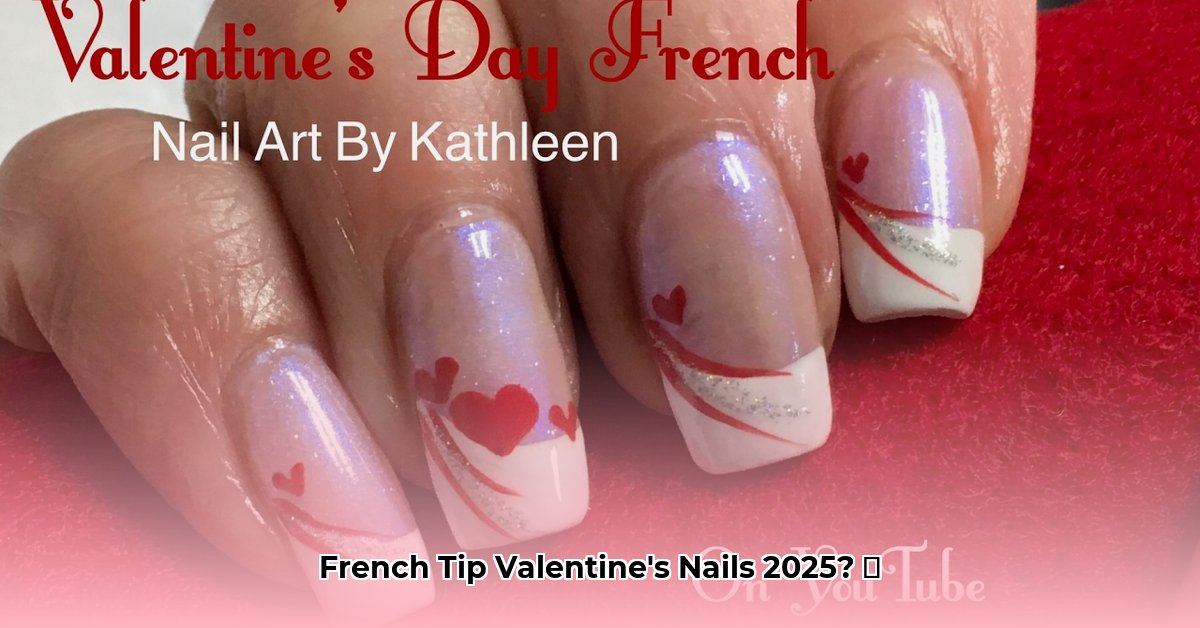
Design 1: Classic Red & White with a Touch of Heart
This design is the epitome of Valentine's Day elegance—simple, charming, and utterly romantic.
- Prep your nails: Apply a base coat and let it dry completely. This is essential for a long-lasting manicure.
- Valentine's Day base: Paint your nails with your chosen color—a classic red is always a winner! Two thin coats are usually sufficient. Allow each coat to dry thoroughly.
- French tips: Using a thin brush (or striping tape), carefully paint a white crescent shape at the tip of each nail. Slight imperfections add to the charm.
- Heart accents: Once the tips are dry, paint a tiny red heart near the base of each nail. A single, delicate heart adds a perfect romantic touch.
- Finishing touch: Seal with a top coat for shine and durability. Your nails are now ready to steal hearts!
Design 2: Glitter Heart French Tip: Shine Bright!
Ready to add some sparkle? This design is all about glittery goodness!
- Base coat: Apply a base coat.
- Vibrant base: Paint your nails with a bold color like pink or red. Let it dry.
- Glitter hearts: Create heart shapes using glitter polish. You can freehand or use tape for clean edges. Apply generously, then remove the tape.
- Top coat: Seal in the shimmer with a top coat for that extra Valentine’s Day sparkle.
Design 3: Chrome Accents: A Touch of Glamour
Want something high-fashion? This design incorporates the ever-popular chrome powder.
- Base coat: Begin with a base coat.
- Light base: Use a light pink or nude base color for contrast. Apply two coats.
- White tips: Paint classic white French tips.
- Chrome application: Once dry, apply chrome powder to the white tips, using a brush or sponge.
- Bow details: Add small bow shapes using a thin black nail art pen.
- Top coat: Finish with a top coat.
Design 4: Conversation Hearts: Playful Whimsy
This design captures the playful spirit of Valentine's Day!
- Base coat: Apply a base coat.
- Pastel base: Use a pastel pink or light coral.
- White tips: Paint classic French tips.
- Conversation hearts: Freehand tiny conversation hearts near the cuticle. Imperfect shapes add charm.
- Top coat: Seal with a top coat.
Design 5: Minimalist Valentine's Day: Simple Elegance
Sometimes, less is more! This design is sophisticated and understated.
- Base coat: Apply a base coat.
- Nude base: Apply two coats of a delicate nude or light pink polish.
- Barely-there tips: Create thin white tips.
- Top coat: Seal with a top coat.
No matter your chosen design, remember to have fun! These looks are all about self-expression and celebrating Valentine's Day. Now go create your stunning Valentine's Day manicure! Don't forget to share your creations on social media using #ValentinesDayNails2025!